티스토리 뷰
[Android] 안드로이드 - 문자열 리소스(Resource) 추가 및 참조하기
Lkt_Programmer 2019. 5. 9. 17:371. 문자열 리소스 - /res/values/Strings.xml
안드로이드 프로젝트를 생성하게 되면 /res/values/ 경로 아래에 strings.xml이라는 xml 리소스 파일을 확인할 수 있습니다.

▼ 해당 파일은 프로젝트 생성당시에 default로 생성되는 xml 리소스 파일입니다. 이미 app_name이라는 이름을 가진 문자열 리소스가 정의되어 있습니다. 각 태그 요소와 xml 리소스 작성방법에 대해 살펴보겠습니다.
● <resource> 요소
xml 리소스를 추가하는데 있어서 필수로 들어가는 루트 요소입니다. 반드시 추가하는 리소스는 <resource> ~ </resource> 내부에 작성되어야 합니다.
● <string> 요소
단일 문자열 리소스를 추가할 때 사용하는 요소입니다. 반드시 name 속성값을 지정해야 하며 name 속성값은 문자열의 이름이자 다른 곳에서 참조해야 할 리소스 ID로 사용됩니다.
2. 단일 문자열 리소스 추가하기
문자열 리소스 추가는 default로 생성되는 string.xml에 추가해도 됩니다. 다만, 실습 예제는 따로 xml 리소스 파일을 추가해서 문자열 리소스를 추가해보는 방식으로 진행하도록 하겠습니다.

▼ 프로젝트 경로의 /values 폴더를 우클릭하여 [New] -> [Values resource file]을 클릭합니다. 리소스 파일 이름은 자유롭게 지정하고 ok를 클릭하면 리소스 파일이 생성됩니다.

▼ 이미 작성하기 쉬운 Format으로 파일이 생성되기 때문에 <resource> ~ </resource> 안에 <string>을 통해 문자열 리소스를 추가해주면 됩니다.
<?xml version="1.0" encoding="utf-8"?>
<resources>
    <string name="TEST_STRINGRESOURCE1">Test 첫 번째 문자열입니다.</string>
    <string name="TEST_STRINGRESOURCE2">Test 두 번째 문자열입니다.</string>
    <string name="TEST_STRINGRESOURCE3">Test 세 번째 문자열입니다.</string>
    <string name="TEST_STRINGRESOURCE4">Test 네 번째 문자열입니다.</string>
    <string name="TEST_STRINGRESOURCE5">Test 다섯 번째 문자열입니다.</string>
</resources>
▼ 문자열 리소스 5개를 추가한 형태입니다. 주의할 건 name 속성값은 resource ID 값으로 사용되기 때문에 중복은 피해 줍니다. 꼭 그게 아니더라도 해당 문자열 리소스를 나타내는 명시적인 이름을 사용해주는 게 좋기 때문에 신경 써서 이름을 작성해주는 게 좋습니다.
3. 자바 소스에서 문자열 리소스 참조하기
이번에는 추가한 문자열 리소스를 자바 소스에서 참조하는 방법을 살펴보겠습니다. 앞서 mystring.xml 리소스 파일에서 정의한 문자열 리소스를 참조할 것이며 해당 문자열 리소스를 통해 Text를 표현하기 위해 TextView가 배치된 레이아웃 리소스를 구성합니다.
<LinearLayout xmlns:android="http://schemas.android.com/apk/res/android"
    android:orientation="vertical" android:layout_width="match_parent"
    android:layout_height="match_parent">

    <TextView
        android:id="@+id/textView1"
        android:layout_width="match_parent"
        android:layout_height="wrap_content"
        android:text="TextView" />

    <TextView
        android:id="@+id/textView2"
        android:layout_width="match_parent"
        android:layout_height="wrap_content"
        android:text="TextView" />

    <TextView
        android:id="@+id/textView3"
        android:layout_width="match_parent"
        android:layout_height="wrap_content"
        android:text="TextView" />

    <TextView
        android:id="@+id/textView4"
        android:layout_width="match_parent"
        android:layout_height="wrap_content"
        android:text="TextView" />

    <TextView
        android:id="@+id/textView5"
        android:layout_width="match_parent"
        android:layout_height="wrap_content"
        android:text="TextView" />
</LinearLayout>
public class MainActivity extends AppCompatActivity{
TextView textView1;
TextView textView2;
TextView textView3;
TextView textView4;
TextView textView5;
@Override
protected void onCreate(Bundle savedInstanceState) {
super.onCreate(savedInstanceState);
setContentView(R.layout.activity_resource);
this.InitializeView();
this.setTextView();
}
public void InitializeView()
{
textView1 = (TextView)findViewById(R.id.textView1);
textView2 = (TextView)findViewById(R.id.textView2);
textView3 = (TextView)findViewById(R.id.textView3);
textView4 = (TextView)findViewById(R.id.textView4);
textView5 = (TextView)findViewById(R.id.textView5);
}
public void setTextView()
{
textView1.setText(getString(R.string.TEST_STRINGRESOURCE1));
textView2.setText(getString(R.string.TEST_STRINGRESOURCE2));
textView3.setText(getString(R.string.TEST_STRINGRESOURCE3));
textView4.setText(getString(R.string.TEST_STRINGRESOURCE4));
textView5.setText(getString(R.string.TEST_STRINGRESOURCE5));
}
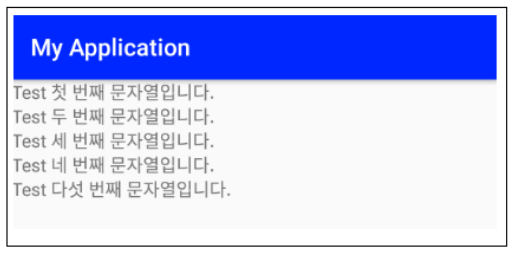
}▼ mainActivity 클래스는 TextView를 참조할 수 있는 변수 5개를 가지고 멤버 변수로 InitializtView Method와 setTextView() Method를 가집니다. InitializeView() Method는 레이아웃 리소스에서 정의했던 TextView들의 참조 객체를 얻어오는 함수입니다. 다음 setTextView() Method에서 리소스 파일에 정의된 문자열 리소스를 가져와 TextView의 Text에 지정합니다
▼ 문자열 리소스를 가지고 오기 위해 getString() Method를 호출합니다. 인자로 찾고자하는 문자열의 리소스 ID 즉 문자열 이름을 지정해주는데 R.string. 문자열 이름 방식으로 참조가 가능합니다.
4. xml 레이아웃 리소스에서 문자열 리소스 참조하기
이번에는 xml 레이아웃 리소스상에서 TextView의 Text 속성 값을 문자열 리소스를 사용하여 설정하는 방법을 살펴보겠습니다.
<LinearLayout xmlns:android="http://schemas.android.com/apk/res/android"
    android:orientation="vertical" android:layout_width="match_parent"
    android:layout_height="match_parent">

    <TextView
        ...
        android:text="@string/TEST_STRINGRESOURCE1" />

    <TextView
        ...
        android:text="@string/TEST_STRINGRESOURCE2" />

    <TextView
        ...
        android:text="@string/TEST_STRINGRESOURCE3" />

    <TextView
        ...
        android:text="@string/TEST_STRINGRESOURCE4" />

    <TextView
        ...
        android:text="@string/TEST_STRINGRESOURCE5" />
</LinearLayout>
▼"@string/리소스 ID" 형식으로 참조가 가능합니다.
5. 문자열 포맷(Format) 지정하기
만약 다음과 같은 Value를 가지는 문자열 리소스가 있다고 가정을 해보겠습니다.
"당신의 점수는 100점입니다."
해당 문자열에서 점수는 상황에 따라 변경되어야 하는 값입니다. 이러한 유동적인 값을 소스상에서 처리하기 위해서는 String 클래스의 멤버 함수인 format() Method를 활용합니다.
<?xml version="1.0" encoding="utf-8"?>
<resources>
    <string name = "SCORE">당신의 점수는 %d점입니다.</string>
</resources>
▼ 점수가 들어가야 하는 부분에 % d가 들어갔습니다. C/C++ 언어를 접하신 분들은 익숙한 부분입니다. %d는 정수형 데이터를 출력할 수 있는 서식 문자입니다.
<LinearLayout xmlns:android="http://schemas.android.com/apk/res/android"
    android:orientation="vertical" android:layout_width="match_parent"
    android:layout_height="match_parent">

    <TextView
        android:id="@+id/textView1"
        android:layout_width="match_parent"
        android:layout_height="wrap_content"
        android:text="test" />

</LinearLayout>
▼ 레이아웃 구성은 간단하게 TextView 1개를 배치해줍니다.
public class MainActivity extends AppCompatActivity{
    @Override
    protected void onCreate(Bundle savedInstanceState) {
        super.onCreate(savedInstanceState);
        setContentView(R.layout.activity_resource);

        TextView textView = (TextView)findViewById(R.id.textView1);

        String text = getString(R.string.SCORE);

        textView.setText(String.format(text,100));
    }
}
▼ 먼저 getString()을 통해 SCORE 문자열 리소스를 참조하여 text 문자열 변수에 저장합니다. setText()를 통해 TextView의 Text를 지정할 때는 text를 그대로 넘기는 게 아니라 String Class의 format()을 통하여 %d에 출력할 정수형 데이터를 지정해줍니다.

6. 작은따옴표 (') 큰 따옴표 (") 출력하기
문자열 리소스에서 작은따옴표와 큰 따옴표를 출력하기 위해서는 아래와 같이 사용하면 정상적으로 원하는 출력물을 얻을수 없습니다.
<?xml version="1.0" encoding="utf-8"?>
<resources>
    <string name = "TEST_RESOURCE1">테스트 문자열 : 'Hello'</string>
    <string name = "TEST_RESOURCE2">테스트 문자열 : "Hello"</string>
</resources>
▼ Hello를 감싸는 작은 따옴표와 큰 따옴표를 표현하기 위해서는 아래와 같이 사용합니다.
<?xml version="1.0" encoding="utf-8"?>
<resources>
    <string name = "TEST_RESOURCE1">테스트 문자열 : \'Hello\'</string>
    <string name = "TEST_RESOURCE2">테스트 문자열 : \"Hello\"</string>
</resources>
▼ 서식 문자를 활용하여 작은따옴표는 \' 같이 작성하고 큰 따옴표의 경우는 \" 작성합니다.
'Programming > Android 개발' 카테고리의 다른 글
| [Android] 안드로이드 - 문자열 배열 리소스 추가하기 <string-array> (0) | 2019.05.11 |
|---|---|
| [Android] 안드로이드 - 문자열 리소스를 활용한 다국어 지원 (0) | 2019.05.10 |
| [Android] 안드로이드 - 텍스트뷰(TextView) 사용법 정리 (2) | 2019.05.07 |
| [Android] 안드로이드 - 버튼 이벤트 처리방법 정리 (리스너 구현 및 이벤트 핸들링) (1) | 2019.05.06 |
| [Android] 안드로이드 - 익명 클래스(Anonymous Class) 사용법 (0) | 2019.05.05 |